Rumble Jar Instructions: A Comprehensive Guide
Rumble Jar simplifies cold brew creation within a mason jar, offering a convenient method for coffee enthusiasts! Detailed brewing instructions, alongside FAQs and helpful tips, are readily available online.
The system is also dishwasher safe, ensuring easy cleanup after enjoying your perfectly brewed, refreshing cold brew, especially on a hot day!
What is a Rumble Jar?
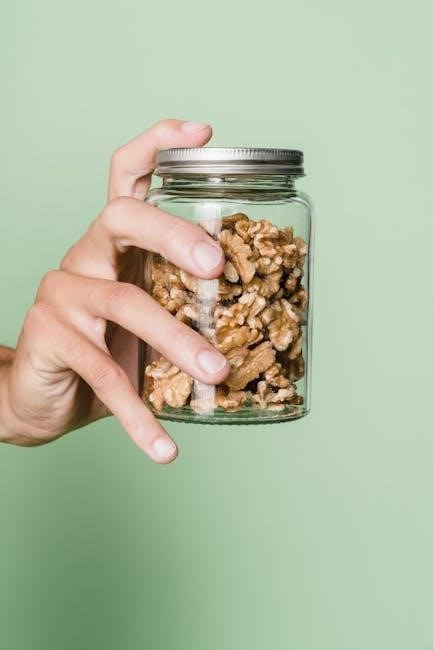
The Rumble Jar represents a remarkably innovative approach to crafting cold brew coffee, ingeniously designed to function directly within a standard mason jar. It’s a complete system, encompassing a stainless steel filter and a secure silicone cap, eliminating the need for separate, cumbersome cold brew equipment.
Essentially, it transforms your everyday mason jar into a dedicated cold brew maker. This streamlined design offers a convenient and accessible method for enjoying smooth, less acidic coffee at home. The system’s simplicity is a key feature, making cold brew preparation straightforward for both beginners and seasoned coffee lovers.

Beyond convenience, the Rumble Jar prioritizes ease of cleaning; many users confirm it is dishwasher safe. It’s a practical solution for those seeking a hassle-free way to incorporate cold brew into their daily routine, offering a refreshing alternative to traditional hot brewing methods.
Understanding the Components
The Rumble Jar system comprises two primary components: a durable stainless steel filter and a food-grade silicone cap. The stainless steel filter is meticulously engineered to contain coffee grounds during the brewing process, preventing sediment from ending up in your final cold brew concentrate.
This filter isn’t just a container; it’s designed for easy loading and secure locking. The accompanying silicone cap creates a tight seal on top of the mason jar, ensuring no leaks or spills occur during brewing or when transporting your cold brew.
These components work in harmony to deliver a clean, efficient cold brewing experience. The materials are chosen for their durability and ease of cleaning, with many users confirming dishwasher compatibility. Together, they represent a simple yet effective solution for consistently producing high-quality cold brew coffee.
Benefits of Using a Rumble Jar for Cold Brew
The Rumble Jar offers a streamlined approach to cold brew coffee, eliminating the need for bulky, specialized equipment. Its design allows you to utilize readily available mason jars, making it a cost-effective and space-saving solution for coffee lovers.
Beyond convenience, the Rumble Jar promotes a cleaner, smoother cold brew experience. The stainless steel filter effectively contains grounds, preventing sediment from infiltrating your final concentrate. This results in a more refined and enjoyable cup of coffee.
Cleanup is remarkably simple, as the system is largely dishwasher safe. Whether enjoying a batch at Death Valley hot springs or at home, the Rumble Jar delivers consistent results and ease of use, making cold brew accessible to everyone!
Getting Started: Initial Setup
Begin your cold brew journey by preparing your Rumble Jar! Load and securely lock the stainless steel filter, readying it for the flavorful coffee grounds to come.
First-Time Cleaning and Preparation
Before your inaugural cold brew experience with the Rumble Jar, a thorough cleaning is essential. While the Rumble Jar is conveniently dishwasher safe, a preliminary hand wash is recommended to ensure complete removal of any manufacturing residues.
Carefully disassemble the filter assembly – the stainless steel filter and silicone cap – and wash each component with warm, soapy water. Rinse meticulously to eliminate all traces of soap. Inspect the silicone cap for a secure fit; it’s crucial for proper brewing.
The mason jar itself should also be washed and dried. This initial preparation guarantees a clean slate for your first batch, allowing the pure flavors of your chosen coffee beans to shine through, uncompromised by any lingering impurities. A clean setup is a happy setup!
Coffee Bean Selection for Optimal Flavor
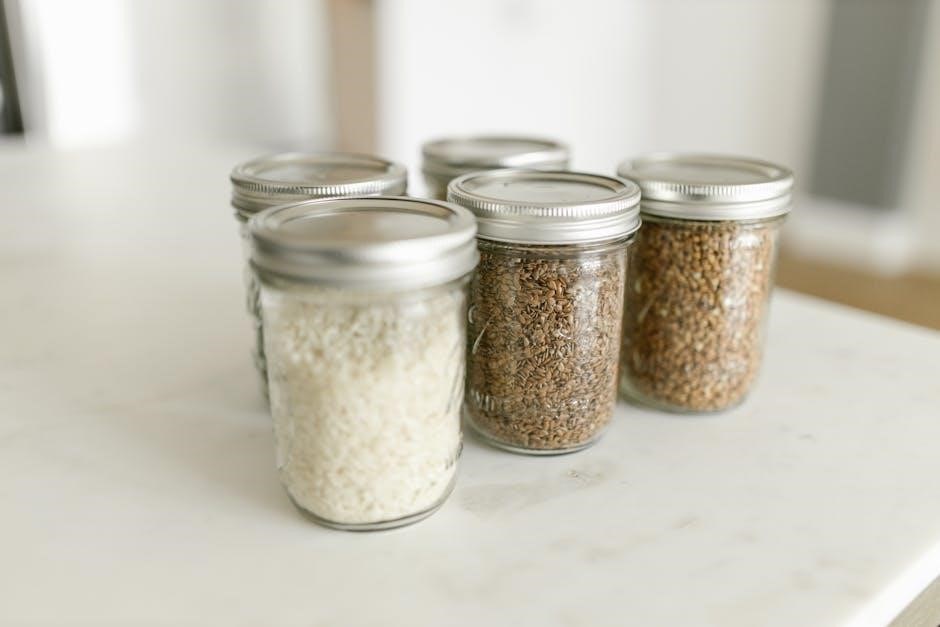
The foundation of exceptional cold brew lies in selecting high-quality coffee beans; While personal preference reigns supreme, certain bean characteristics lend themselves particularly well to the Rumble Jar’s brewing process.
Medium to dark roast beans generally yield a smoother, less acidic cold brew, highlighting chocolatey and nutty notes. Single-origin beans can showcase unique flavor profiles, while blends offer a balanced experience. Experimentation is key to discovering your ideal bean!
Freshly roasted beans are paramount; aim to use beans within a few weeks of their roast date for peak flavor. Consider the origin and processing method – washed beans often produce cleaner cups, while natural processed beans offer fruitier complexities. Ultimately, choose beans that appeal to your palate and prepare for a delightful cold brew journey!
Grind Size Recommendations
Achieving the perfect cold brew with your Rumble Jar hinges on selecting the correct grind size. A coarse grind is absolutely essential; think French press consistency. This prevents over-extraction and ensures a clean, sediment-free brew.
Avoid fine grinds, as they will pass through the stainless steel filter, resulting in a muddy and bitter final product. A coarser grind also allows for optimal water flow, maximizing flavor extraction without clogging the filter.
If you’re grinding your own beans, start with a setting slightly coarser than you would use for a French press and adjust as needed based on your taste preferences. Remember, a consistent grind is crucial for even extraction and a balanced cup of cold brew!

Brewing Instructions: Step-by-Step
Rumble Jar brewing involves loading the filter with grounds, securing the silicone cap, adding water, and allowing sufficient brewing time for optimal flavor development!
Step 1: Loading the Filter
Loading and locking the filter is the initial crucial step in the Rumble Jar brewing process. Begin by carefully removing the stainless steel filter assembly from the jar. Ensure your hands are dry to maintain a secure grip.
Next, gently pour your chosen coffee grounds directly into the stainless steel filter. The amount of coffee will depend on your desired coffee-to-water ratio, but start with a standard recommendation for cold brew.
Once the grounds are inside, meticulously secure the silicone cap onto the filter assembly. This cap is designed to create a tight seal, preventing grounds from escaping during the brewing process. A properly secured cap is essential for a clean and flavorful cold brew!
Double-check that the cap is firmly in place before proceeding to the next step – adding water.
Step 2: Adding Coffee Grounds
After loading the filter, the next step is adding the coffee grounds – the heart of your cold brew! The quality and grind of your coffee beans significantly impact the final flavor profile, so choose wisely.
Carefully pour your pre-ground coffee into the stainless steel filter. The amount you use will depend on your preferred coffee-to-water ratio; experimentation is encouraged! A general starting point is around 1 cup of coarsely ground coffee for every 4 cups of water.
Ensure the grounds are evenly distributed within the filter for consistent extraction. Avoid overfilling the filter, leaving enough space for water to flow through effectively.
Remember, a coarser grind is generally recommended for cold brew to prevent sediment from passing through the filter. Once the grounds are in place, proceed to securing the silicone cap, preparing for the water addition.
Step 3: Securing the Silicone Cap
With the coffee grounds nestled within the filter, it’s time to secure the silicone cap – a crucial step for a successful brew! This cap creates a watertight seal, preventing grounds from escaping during the infusion process and ensuring optimal extraction.
Carefully place the silicone cap over the stainless steel filter, aligning it properly with the jar’s opening. Gently but firmly press down around the edges of the cap to create a snug fit. You should feel a secure seal, indicating that water won’t bypass the coffee grounds.
Double-check the cap’s placement to ensure it’s fully seated. A properly secured cap is essential for preventing a messy cleanup and maximizing the flavor of your cold brew.
Now that the filter and cap are secure, you’re ready to move on to the next step: adding water and initiating the brewing process!
Step 4: Adding Water
With the silicone cap securely in place, it’s time to introduce the water – the catalyst for your cold brew journey! Gently pour cold, filtered water over the coffee grounds within the Rumble Jar. The amount of water will depend on your desired coffee-to-water ratio and the size of your mason jar.
Ensure the water fully saturates all the coffee grounds, avoiding any dry pockets. Pour slowly and evenly to prevent disturbing the grounds and maintaining a consistent extraction. Leave some space at the top of the jar to allow for expansion and easy stirring.
Once the water is added, give the mixture a gentle stir to ensure all grounds are fully immersed. This initial stir helps initiate the brewing process and promotes even extraction.
Now, your cold brew is officially underway! Proceed to the next step to understand the importance of brewing time.
Step 5: Brewing Time – The Key to Flavor
Now comes the patience-testing, yet crucial, stage: brewing! The duration significantly impacts the final flavor profile of your cold brew. Generally, a brewing time between 12 and 24 hours is recommended, but experimentation is encouraged to find your sweet spot.
Shorter brew times (around 12-16 hours) yield a brighter, more acidic brew, while longer times (18-24 hours) result in a smoother, less acidic, and more full-bodied concentrate. Place the Rumble Jar in the refrigerator during brewing to maintain a consistent temperature and prevent unwanted fermentation.
Resist the urge to peek or stir during the brewing process; let the magic happen undisturbed. Remember, brewing is not a race, but a delicate extraction of flavors!
Once the desired brewing time has elapsed, it’s time to move on to filtration and savor the fruits of your labor.
Post-Brewing: Filtration and Serving
After brewing, easily remove the filter assembly! Utilize the convenient swirl-and-dump method for effortless grounds disposal, then dilute the concentrate and enjoy your refreshing brew.
Removing the Filter Assembly
Removing the filter assembly from your Rumble Jar is a straightforward process, designed for minimal mess and maximum convenience. After the brewing time is complete, carefully lift the entire filter assembly – consisting of the stainless steel filter and the secured silicone cap – straight up and out of the mason jar.
It’s important to hold the silicone cap firmly against the filter during removal to prevent any stray coffee grounds from escaping. A gentle, controlled lift is all that’s needed. Avoid tilting or shaking the assembly excessively, as this could lead to spills. Once removed, the filter assembly is ready for the next step: grounds disposal, utilizing the efficient swirl-and-dump method.
The design ensures a secure fit during brewing, but also allows for easy and clean removal when it’s time to enjoy your cold brew concentrate!
The Swirl-and-Dump Method for Grounds Disposal
The Rumble Jar’s “Swirl-and-Dump” method offers a remarkably clean and efficient way to dispose of used coffee grounds. Begin by gently knocking out the bulk of the grounds into your preferred disposal location – a trash bin, compost bin, or even directly into your garden, enriching the soil!
Next, with the filter assembly still held securely, give the jar a gentle swirl. This action dislodges any remaining grounds clinging to the filter. Finally, invert the jar and allow the remaining grounds to fall out. This minimizes mess and ensures almost all grounds are removed.
This technique, demonstrated in a quick video, is a customer favorite for its simplicity and effectiveness. It’s a key feature contributing to the Rumble Jar’s overall user-friendly design, making cold brew cleanup a breeze!
Dilution and Serving Suggestions
Cold brew concentrate from the Rumble Jar is incredibly versatile! Because of its concentrated nature, dilution is typically required to achieve your desired strength. A common starting point is a 1:1 ratio of concentrate to water, but feel free to adjust to your personal preference – experiment to find your sweet spot!
Serve your diluted cold brew over ice for a refreshing experience, or explore creative variations. Try adding a splash of milk or a plant-based alternative for a creamy texture. Enhance the flavor with simple syrups, like vanilla or caramel, or even a hint of cinnamon.
Cold brew also makes a fantastic base for iced lattes, cold foam coffees, and even coffee-based cocktails. The possibilities are endless, allowing you to enjoy your Rumble Jar brew in countless ways!
Maintenance and Care
Rumble Jar is designed for easy upkeep! Most customers find it dishwasher safe, simplifying cleaning. Regular cleaning ensures long-lasting use and optimal brewing performance.
Dishwasher Safety
Rumble Jar components are thoughtfully designed with convenience in mind, and a significant benefit is their dishwasher-safe nature. Both the stainless steel filter and the silicone cap can be safely cleaned on the top rack of your dishwasher. This simplifies the post-brewing cleanup process considerably, saving you valuable time and effort.
While dishwasher use is generally safe and recommended by many users, hand washing is also a viable option if you prefer a more delicate cleaning approach. However, for those seeking maximum convenience, the dishwasher provides an efficient and effective cleaning solution. It’s a feature consistently highlighted by satisfied customers, contributing to the overall positive experience with the Rumble Jar system.

Ensure proper loading to avoid any potential damage, and always check manufacturer guidelines for your dishwasher model.
Cleaning Tips for Long-Lasting Use
To ensure your Rumble Jar provides years of delicious cold brew, consistent cleaning is key. After each use, promptly remove the filter assembly and dispose of the coffee grounds using the swirl-and-dump method. This prevents oils from building up and affecting future brews.
While dishwasher safe, occasionally hand washing with mild soap and warm water can help maintain the shine of the stainless steel filter. Pay particular attention to the fine mesh, ensuring no grounds remain lodged within. The silicone cap is flexible and easily cleaned, but inspect it regularly for any signs of wear and tear.
Avoid abrasive cleaners or scouring pads, as these can damage the surfaces. Proper care extends the life of your Rumble Jar, guaranteeing countless batches of smooth, flavorful cold brew!
Troubleshooting Common Issues
Experiencing issues with your Rumble Jar? A common concern is slow dripping. This often indicates the coffee grounds are too fine, restricting water flow. Adjusting to a coarser grind usually resolves this. If grounds escape the filter, ensure the silicone cap is securely locked in place – a proper seal is crucial.
Another potential problem is a lingering metallic taste. Thorough cleaning, as outlined in the maintenance section, will eliminate this. If the issue persists, try brewing with different coffee beans, as some varieties can accentuate metallic notes.
Remember to consult online resources for detailed brewing instructions and FAQs. Most issues are easily addressed with a simple adjustment to your technique or a more thorough cleaning process, ensuring optimal cold brew every time!
Advanced Techniques & FAQs
Rumble Jar allows experimentation with coffee-to-water ratios for personalized flavor! Detailed brewing instructions, alongside frequently asked questions, are easily accessible online for guidance.
Experimenting with Different Coffee-to-Water Ratios
Rumble Jar’s versatility shines when exploring varied coffee-to-water ratios, allowing you to tailor your cold brew’s strength and flavor profile to your exact preferences. While standard recommendations exist, don’t hesitate to deviate and discover your ideal brew!
A common starting point is a 1:8 coffee-to-water ratio (e.g., 1 cup of coffee grounds to 8 cups of water), yielding a balanced, approachable cold brew. For a bolder, more concentrated brew, decrease the water – try a 1:6 or even 1:4 ratio. Conversely, if you prefer a lighter, more delicate flavor, increase the water to a 1:10 or 1:12 ratio.
Remember to meticulously document your experiments! Note the ratio used, brewing time, and your subjective assessment of the resulting flavor. Small adjustments can make a significant difference, so be patient and methodical in your exploration. The Rumble Jar empowers you to become a true cold brew artisan!
Finding Detailed Brewing Instructions Online
Rumble Jar provides a streamlined cold brew experience, and comprehensive brewing instructions are readily accessible online to guide you through each step. Numerous resources are available, including videos and detailed written guides, ensuring a successful brew every time.
The official Rumble Jar website is an excellent starting point, offering clear, concise instructions and helpful tips. You can also find valuable content on platforms like YouTube, where users demonstrate the brewing process visually. Lukas has created an excellent video illustrating the process, based on the website’s instructions.
These online resources cover everything from filter loading and coffee ground addition to water levels and optimal brewing times; Don’t hesitate to explore these materials to deepen your understanding and unlock the full potential of your Rumble Jar. Happy brewing!